A leaking shower can be a frustrating and potentially costly issue. Not only can it lead to water wastage, but it can also cause damage to your bathroom’s structure, create mold and mildew problems, and increase your water bills. If you discover a shower leak, it’s essential to address it promptly to prevent further damage. Here’s what to do if your shower is leaking.
1. Identify the Source of the Leak
The first step in dealing with a leaking shower is to identify the source of the leak. Showers can leak from various areas, including:
- Showerhead: Check for loose connections or damaged gaskets.
- Faucet Handles: Leaks can occur around the faucet handles due to worn-out seals or cartridges.
- Shower Valve: A malfunctioning shower valve can lead to leaks behind the wall.
- Grout and Caulk: Cracked or deteriorated grout and caulk can allow water to penetrate and seep into the wall or floor.
2. Turn Off the Water Supply
Once you’ve identified the source of the leak, turn off the water supply to the shower. There are usually shut-off valves under the sink or behind the shower wall. Shutting off the water will prevent further leakage and water damage while you work on repairs.
3. Inspect and Repair the Showerhead
If the showerhead is the source of the leak, inspect it for loose connections, damaged gaskets, or mineral buildup. Tighten any loose connections and replace any damaged components. Wrapping plumber’s tape around the threads can also help create a better seal.
4. Address Faucet Leaks
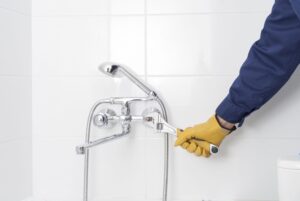
For leaks around faucet handles or spouts, you may need to disassemble the faucet to access and replace worn-out seals or cartridges. Consult the manufacturer’s instructions or seek professional help if you’re unsure about the repair process.
5. Investigate Behind-the-Wall Leaks
If the leak seems to be coming from behind the shower wall, you may need to open the wall to access and repair the plumbing. This can be a more complex and time-consuming task, so it’s advisable to hire a licensed plumber for such repairs.
6. Repair Grout and Caulk
If the leak is due to damaged grout or caulk, remove the old material and reapply new grout or caulk in the affected areas. Ensure a watertight seal to prevent further leaks.
7. Test for Proper Sealing
After making repairs, turn the water supply back on and test your shower to ensure the leak is resolved. Check for any signs of leakage or water infiltration.
8. Prevent Future Leaks
To prevent future shower leaks, consider the following measures:
- Regularly inspect and maintain your shower fixtures.
- Avoid using abrasive cleaners that can damage grout and caulk.
- Periodically reseal grout and caulk to maintain their integrity.
- Address any leaks promptly to prevent water damage and mold growth.
9. Seek Professional Help
If you’re unsure about the source of the leak or lack the necessary plumbing skills, don’t hesitate to seek professional help. A licensed plumber can diagnose and repair complex issues, ensuring that your shower is leak-free and functioning correctly.
Contact Michael Runk Plumbing and Heating
When facing a plumbing emergency, turn to the plumbing experts of Michael Runk Plumbing and Heating. We have over 20 years of experience in residential and commercial plumbing. Take prompt action, and contact us now to schedule an appointment.

